Code to make the machine.

Code.. That’s the deal isn’t it?
The actual finished package design.

Here’s a link to the folders you will need. Download them from the lLeft Coast github account. They will be labeled where they should go on your system.
RPN_Calculator - Has a couple folders.
First step : Get your touchscreen to work on your standard Arduino with Adafruit’s demo. stuff. Just like it’s supposed to work. This will be between you and the Adafruit folks. Its a big enough nut to crack in itself. And, you’ll learn a lot.
Second Step : Get the Teensy stuff installed and be able to run the “blink” sketch from the IDE. Yet another learning curve. This will be between you and the Teensy people.
Third step : Wire the Teensy into the touchscreen. Its not supposed to be wired to a Teensy, so there’s a trick to it. Notice the header pins? They are not through hole pins. But, they do have handy little feet sticking out. One each so that you can, if your careful, solder your wires to the feet.
Fourth step : Get the Adafruit demo code running on the touchscreen from your Teensy. You will need to set the clock speed to 78. You don’t want the “over-clock” default selection. Its a menu item on the IDE.
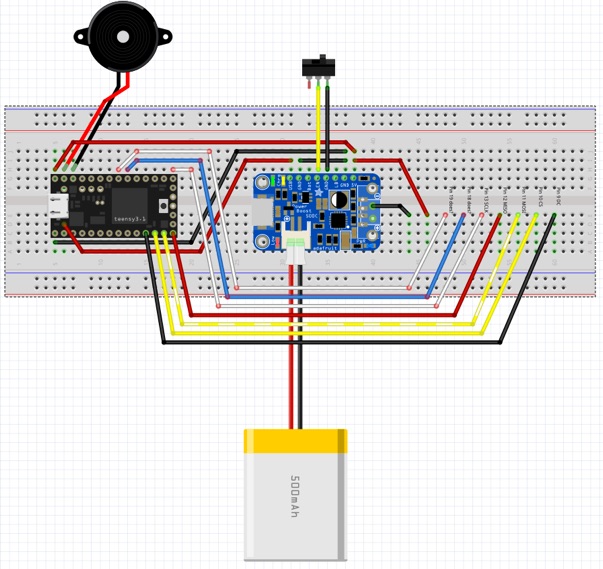
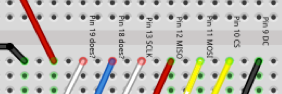
Wiring it all up. The missing part is the touchscreen. But at least the diagram has the pin numbers you need to hook things to on the processor.
Last step : Notice I saved our stuff ‘till last? This is because there are so many learning curves one must overcome to get all these things to work together. Each step has its “owner”. The owners of each step are the ones to help out. Meaning, if you make it this far, you’ll be WAY easier to help, because you’ll be educated on all the foundation steps. And, it’ll just be our stuff that’s the trouble.
So download the code from our github link drop the HP_Calc folder into your Arduino folder and the LC_RPNCalculator, LC_Screen, LE_baseTools into your Arduino libraries folder.
